Wednesday, December 7, 2011

Christmas Paper Garland

Today in our office we made paper garland. I work for an environmental agency, so we used all recycled materials, and things we had around the house. The tutorial is pretty simple, and if you wanted you could probably up the sparkle of your garland by using some festive scrapbook papers, decorative ribbons, and a few embellishments to make your Christmas trees look fantastic!
The tutorial we used comes from this website: http://www.renewsing.com/2010/12/02/green-macgyver-christmas-paper-bauble-garland-%E2%80%93-an-eco-friendly-craft-for-kids/ but we decided to make our own, as we improvised some steps.

What you will need:
Scissors (or a circle punch), string (or ribbon, twine, etc.), glue, and the paper(s) of your choice!
Directions:


1) Trace and cut out circles. You will need 3-4 circles per bauble for them to be 3 dimensional. Most of us in the office chose to make 80 circles, for 20 baubles on our garland. You can make as little or as many as you like, depending on what you plan to use it for. Also, if you want to make fuller baubles, plan for more that 4 circles per bauble.

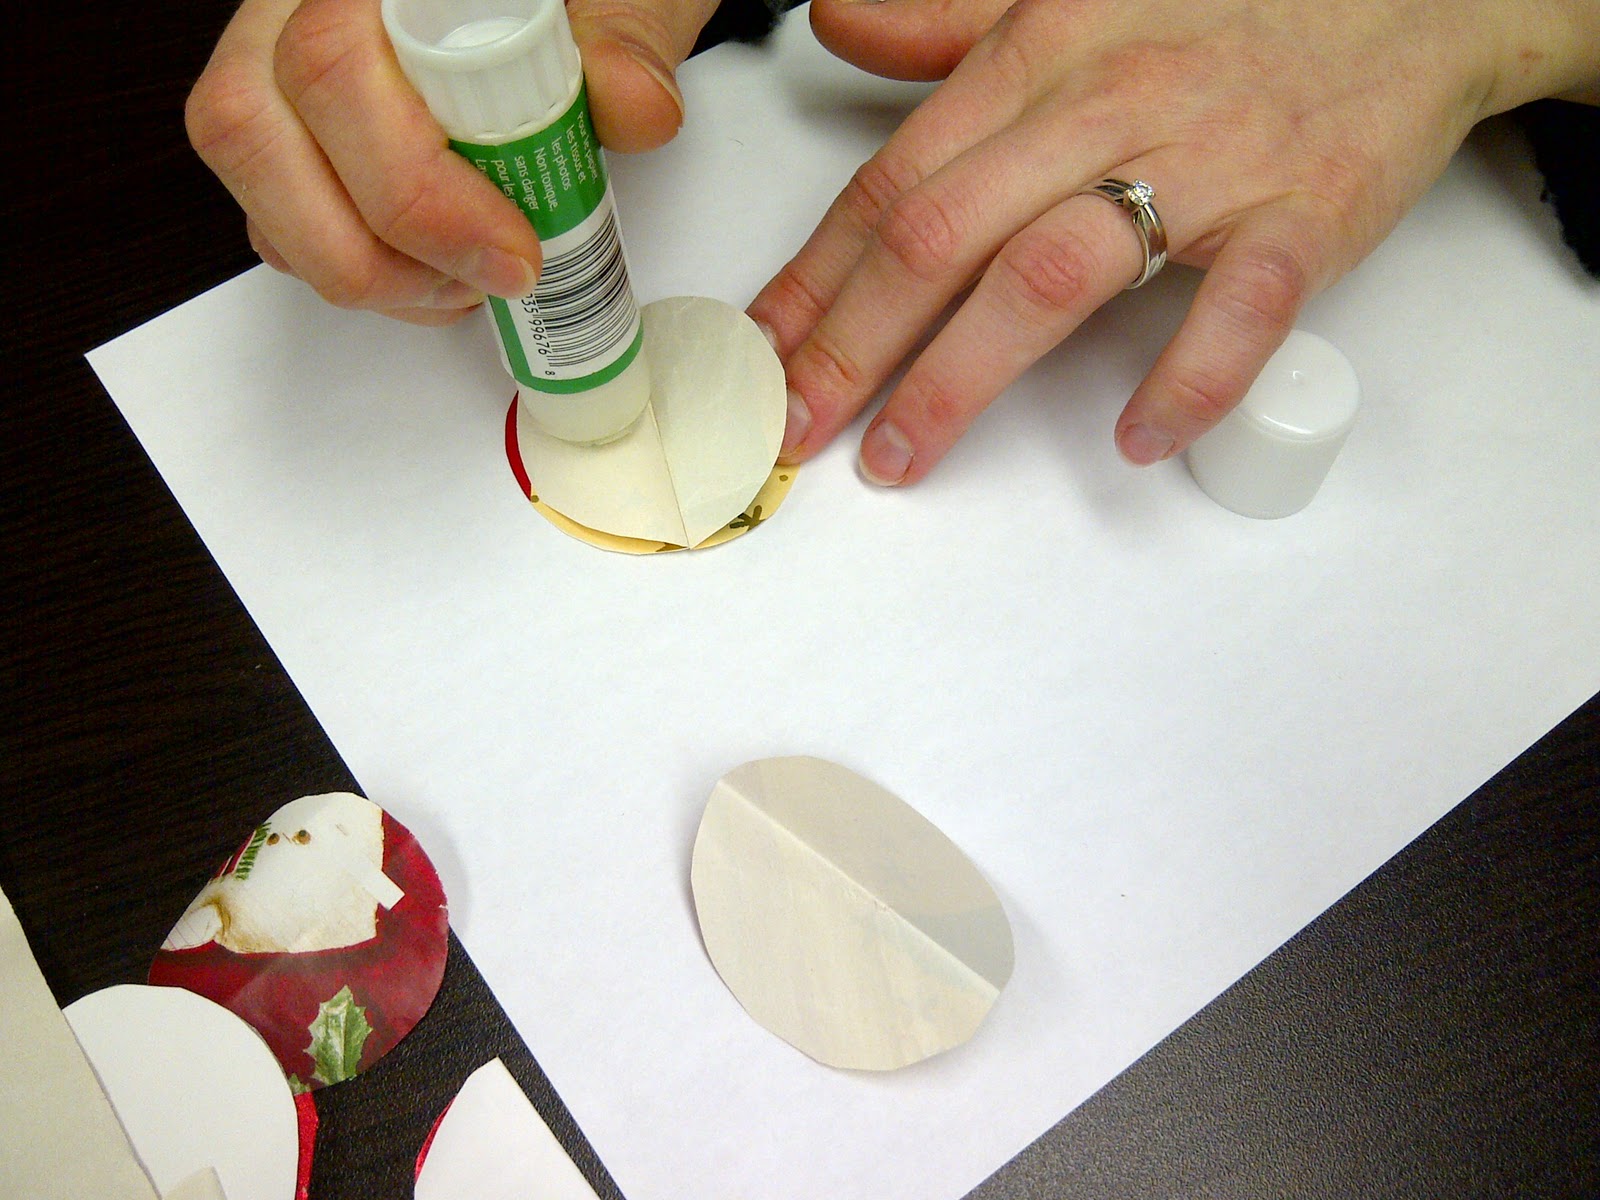
2) Once you have all of your circles cut out, fold them all in half.
You should now have several that look like this.
3) Begin gluing the folded circles together. I glued all of mine into pairs to start. Don't glue all four sides together yet.


*now you have a choice to make* in the link provided it shows that you do glue all four sides together, and then thread your string through the middle to put all the baubles together. We found that this would work if a) you are using yarn or something similar; and b) your needle is longer that your circles. We didn't do this, but if you want to, you can :)

4) Once you have all of your baubles, with one side open, lay your ribbon in, and glue the final side together. It should begin to look like this:
For this one, no space was left between the baubles

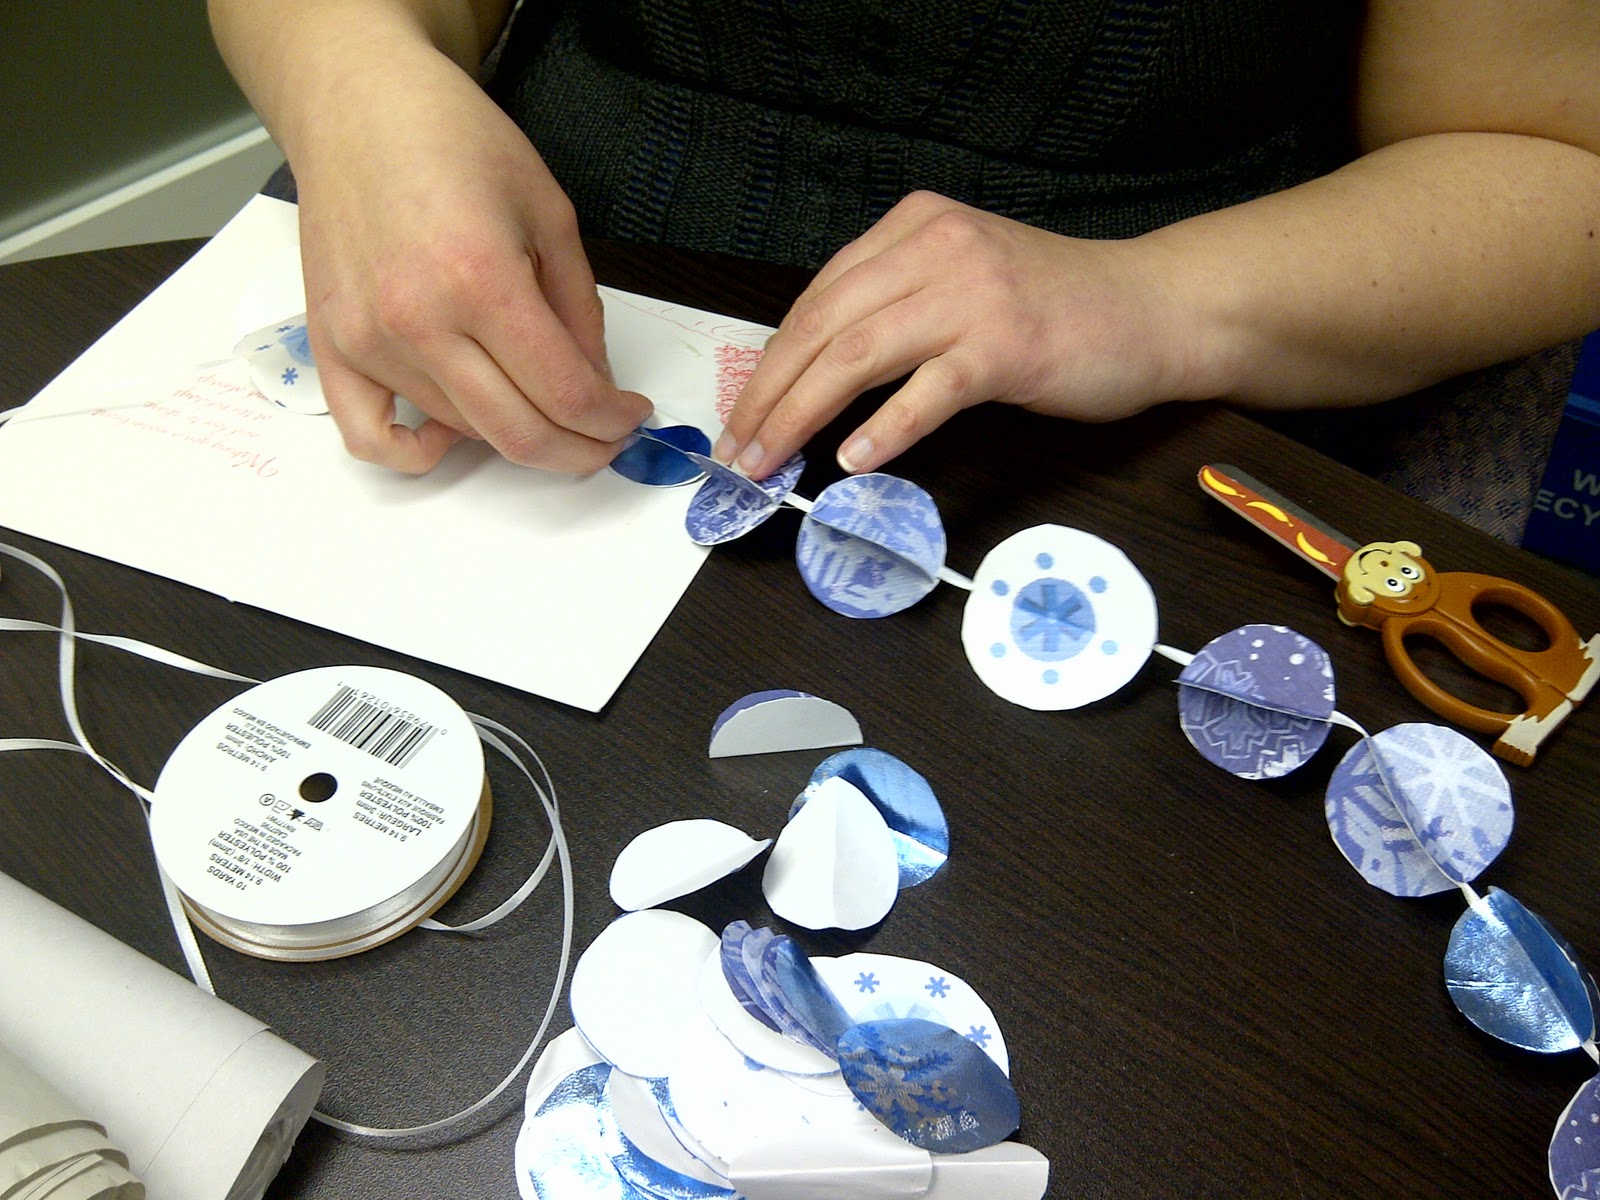
For this one, small spaces were left. If you are using decorative ribbon, this may be a  better option for you.
Of course, the spacing is your choice!

Eventually your garland will start to take shape!

I kept a loop at the top of mine to tie them together!
Some variations of this craft would be to make it from fabric if you like to sew, or you could make these into ornaments but making a larger loop than what I did above and making fuller baubles. One girl in our office even used squares instead of circles, and her's looks great to!
This is a very versatile craft, which can be as big or small, and as fancy or as eco-friendly as you want it to be! Also, its a VERY easy craft to do with children!

Enjoy your crafting!

Sunday, November 6, 2011

Scrapbooking Vacations

In 2009 BF and I went on our first trip together, to Varadero, Cuba for his sister's wedding. I spent the next year working on their scrapbook to give them as a one year anniversary gift and never got around to doing any personal scrapbooking (during that year there was a lot of life things going on as well: moving, renos, etc. that kept me away from crafting). So, in the last month I have finally set up a decent enough area to get some work done, and I am getting down to it! The start of our trips together, Volume One:
This is the title page for our album. I didn't want to do a separate book for every vacation, as I thought that would be overkill.
For this I didn't buy anything new, and a lot of the materials were gifted. I had 2-3 travel themed kits that I used some papers and stickers from. The pink key used here, I actually found left behind after a class when I had went in to use their die cut machine, and have had lying around for about 6 years! I wanted this page to just be loud, busy, fun, and all about travelling! It doesn't have any theme, and it's only purpose is the words "Ryan & Jessica's Excellent Adventures". I left the vertical arrow on the left blank underneath the words 'world travellers' so I could write 'Volume One' when the time comes.
Unfortunately I don't know how to rotate this. The saved file on my computer is the right way, and it keeps uploading wrong, but anyway. This is the first page of our trip album, and is our journey to Varadero, Cuba.

For this I also didn't buy anything new. The Cuba flag I made just using card stock. I couldn't find any Cuba related items at any craft stores in St. John's. There were a few online that I found, but for the prices weren't very nice, so I had to improvise. I used our boarding cards, a picture of us on the plane, and a cut out of a plane that was in one of the travel themed kits I had. The jeweled word 'vacation' was purchased at Michael's, and the star and sea shell stickers were bought at Buck or Two. I don't love this page, it feels like it is missing a little something.

Below is the adjacent page to this. I like for these pages to match, any books that I have made, and these pages don't complement each other I never end up satisfied with the results.
This page isn't finished yet. I used a lot of different left over letters for the journaling on this one, and also some of my handwriting along the top part. I used the yellow stripped paper and the red star cut out to tie in colours from the adjacent page. where there is a dark photo and writing opens up to a certificate I received on the resort (picture below). I didn't want to leave these memory pieces out, but it was large, and the only photo was dark, so I tried to make them work. I haven't added in the last picture I took from this page yet because I can't decide if I want to pull the orange, teal, and brown from the photo, or if I want to use the greens, blues, and yellow from the opposite page to make sure they match. Suggestions?

So, this is as far as I have gotten with this project, and some papers for school have kept me away from the craft table all weekend, but I do want to commit to this blog, so I took some time to get a few things posted. Hope that you are interested enough in what is to come that you will follow, and keep checking back. I would love for you to leave lots of comments, and links to your blogs if you have one (about anything!)

Have a great day!

Wednesday, November 2, 2011

My Newest Blog!!


Hello Everyone!

I'm very excited to be launching my newest project, and that is this craft blog. I have always considered myself to be a craft-oriented person, with no space to do it in! I grew up watching/helping my mom with tole painting, plastic canvas, crocheting, and several other crafty projects that her creative mind dreamed up! Now, with so many ideas available on the internet, I have just been dying to get a few projects started!

Last December, we bought a house, and I have my very own area to do my crafting!! I love it! Admittedly, it needs a ton of work, but it exists! Which is most of the battle. Take a look:

So, first off, I NEED a new chair, as this one is crap. The string hanging there was a makeshift way for me to hang the baggies I keep all my non-sticker letters separated in. I have them clothes pinned to it. I need A LOT of wall shelving, but it's a start. The table and drawers are really great (I had to tape a few pictures to the drawers because the blah-ness was killing me, but they come off very easy, in fact most of them have already fallen off). The closet no longer as clothes, and is just waiting to have fabric, and so many other goodies piled into it! On the far left is a fireplace for keeping cozy, and on the far right next to the closet is a computer desk (with computer). I mostly do scrapbooking down here, as I keep it all spread out over the desk so I can work on it whenever I have a little bit of time. I will need room for a sewing machine after Christmas (I hope!!!). Anything messy I tend to do upstairs so I don't get a mess on the carpet, but if it needed drying time or something, I would bring it down here. I don't want to do anything too permanent yet, because we still need to paint the ceilings, and I don't want too much to get in the way. (Our whole house it a DIY project!!)

Other than that, to tell you a little bit about me: this is actually a sister blog to one I have been writing for about 3-4 months now, which focuses on reading and book reviews, another one of my favorite things. I love blogging about books, and now crafts because its two things that the BF really doesn't care to hear too much about!! If you would like to check it out, pop over here!

Anyway, I'm looking forward to searching the web for some fantastic crafting blog friends to scope out all your ideas! Over the weekend I will be taking some photos of past projects I have done, and will be making a bit of a time line for some upcoming Christmas projects I want to try (this is after all my first time decorating my VERY OWN house for the holiday season!!).

Hope that some of you decide to stick around ;)